Showing posts with label how-to. Show all posts

Friday, July 6, 2012

Get Nailed: Nautical Nails

It's that time of the year where Nautical print is back in (does it ever really go "out"?) and I'm loving it! I will post later this week a round up of some uber cute nautical themed stuff that you really should consider buying either for yourself or even as a gifts! But for now, I will settle on showing off my awesome (if I do say so myself) nautical print nails!

A few common themes for nautical designs are fish (my fave), a compassrope/netting, anchors & stripes, pirates, a sail boat or you can even apply 3D nail art ! Don't forget essential colors to have on hand are some combination of white, blue, yellow, red,, silver and/or gold. I could go on and on with all the fun stuff you could do, but believe it or not, I'm going to keep it simple this week and jump on the stripes and anchors bandwagon.

I don't know why I kept running into so many problems with this manicure. I initially couldn't decide which colors I wanted to use or what type of design I wanted to draw. Once I decided what to do, I kept smudging my design and having to start all over. I tried to freehand stripes but I don't have a blue nail art pen or nail brush so those came out horrible, then I tried to paint my nails white, place scotch tape where I wanted the white stripes to go then paint over that with navy blue but it kept ripping off my white polish. In short, I felt like an idiot. I finally decided to paint scotch tape blue, yes I said paint the tape, and cut it into strips.

1) Take a strip of scotch tape and paint it whatever color you would like your stripes to be, let dry.

2) Cut colored tape into straight strips, trim to fit nail and cut them to your preferred thickness (that's what she said).

3) Apply the base coat, then pick a base color. I used white for all fingers except my middle I used a glitter red.

4) Next, after white polish is dry, apply your stripes and cover nails with clear top coat.

5) On my middle nail I chose to draw an anchor which is much easier than you would think. Check out this really simple tutorial here. and BAM!, we're done!

Friday, June 29, 2012

Get Nailed: Lazer Show Mani


I've seen similar versions of this mani all over the place and it is super fun! The best part about it is that it is not only super easy, but there are so many color and design combinations that it's practically endless! I first attempted to do this with my handy scotch tape, but scotch tape and Milani Holographic polishes do not mix. Every time I removed my tape design, the polish would come off too. So I dug into my nail art box of treasures until I found a suitable replacement for the scotch tape... nail art tape. Nail art tape is a cheap and fun way to decorate your nails, so you should invest in some and just keep it around as it's pretty versatile.

1.) For this manicure, after my clear base coat, I painted each a finger a different Holographic color and let dry completely.


2.) Next, I cut small pieces of nail tape and placed them in my desired designs on my nails.

3.) Third, I took a black Milani polish and painted over the entire nail, tape and all.

4.) Quickly removed the tape while the black polish was still wet.

5.) Follow with a clear coat only if you are not using matte polish, and viola! there it is, an easy, quick and unique design that reminds me of an awesome lazer show!

Wednesday, May 16, 2012

Stained Salt


I had a Cinco de Mayo gathering of the tacos on, well... you guessed it - the fifth of May. My friends and I wanted margaritas (to go with our copious amount of tacos) and I decided to have some fun with it. Why not dye the rimming salt the colors of the Mexican flag?

I am a brilliant idea maker.

It's incredibly easy:

Wednesday, April 4, 2012

What the Fluff.


I MADE MARSHMALLOWS.

They're actually very easy to make and they're oh-so-tasty.

Ingredients:

3 envelopes of unflavored gelatin
1 cup cold water
1 1/2 cups sugar
1 cup corn syrup
dash of salt
2 teaspoons vanilla extract

Powder:

Powdered sugar
Cornstarch

Tuesday, February 28, 2012

Salted Caramels. NOM.

Come here, little girl... eat some canndyy.
I certainly will, especially when it's salted caramels!

I've been wanting to make candy for a while now, but finally had en excuse: celebrating going to the Edwardian Ball in LA with friends to see Creature Feature. WHAT A GOOD NIGHT TO STUFF OUR FACES.
Here's the recipe:

In one pot warm up 5 tablespoons butter, 1 cup heavy cream, 1/4 teaspoon vanilla, and 1/4 teaspoon salt until butter has melted, as seen in photo on left. Turn off heat.

Thursday, February 23, 2012

Get Nailed: Flower Power

Spring is almost here but the weather in Ventura, Ca is still chilly. So to prep myself for spring and the hopefully warm weather it brings, I've decided to do a floral print on my nails. I tried multiple times to paint different styles of flowers until I found one that I liked.


1.) To start with, paint your nails with a light color for the base polish. I used Sally Hansen Insta Dri in Blue Blast which seems to be discontinued. My sister in law found it on clearance at Target for only $3.24. Added bonus, if you use $1/1 MF coupon and $1/1 Target Coupon, it would only be $1.24, if you can still find it...


Monday, February 13, 2012

Let's Go Have a Champagne Jam

Why just drink your booze when you can eat it, too?


I've been wanting to make champagne jelly for a while now... sounds so delicate and ladylike. What better time to make it than Valentines Day?

I already had a bottle of alcohol-free champage laying around (Gross, right? I won it at work and let's face it, I'll never drink it) but feel free to use the real stuff. No need to buy an expensive bottle, but def don't pick up a nasty one either. Don't ruin the taste by being too cheap, Gurrrl.


Wednesday, February 1, 2012

Sucker for Love

For any of you Whore(der)s who have younger kids that are not yet too cool for Valentine's Day, this post is for you!

Tired of the same 'ol boring Valentine cards your kids fill out every year? Want to do something fun, memorable, and cheap? Make your kid the hit of the classroom on Valentine's day with these four easy-ish hand-made valentines. All you need is colored or construction paper, writing/coloring utensils, lollipops, and tape!

Lovely Lips Lollipop

1.) Draw lips on pink or red paper.

2.) Cut out lips.

3.) Outline lips with a similar color.

4.) Cut a tiny slit in the middle of the lips and push the lollipop stick through so when you suck on the lollipop, you have cartoony exaggerated lips !


Wednesday, December 21, 2011

Get Nailed: This Little Light of Mine

There are many things I love about Christmas, but my absolute favorite thing is the lights! I love them so much that I went a little overboard and painted them on my nails! I was originally inspired by TheBeautyDepartment's fun and unique tutorial where Lauren uses actual string for her string of lights. I am not that ambitious, nor do I have string on hand, so I improvised.


1. Prep your nails with a good base coat. I got a new one when I took advantage of Milani's Cyber Monday sale (I went a little too far buying bought 26 polishes), and I love it so far. It really gives you a smooth canvas to work with!

2. Apply your base color. I went for a fun, holiday gold O.P.I., which happens to be a super rare polish that I found laying around Heather's desk.

3. Next, I took my new Nail Art Polish in Black (also by Milani of course), and made loops to resemble a string of Christmas lights (minus the lights).

4. I used three more of new Milani glitter polishes to dot on lights. You can use any color you want, just have fun with it!

5. Follow with a good top coat, and voila, you've got some fun(ky) Christmas nails!

Friday, December 16, 2011

Welcome to Tamale Town


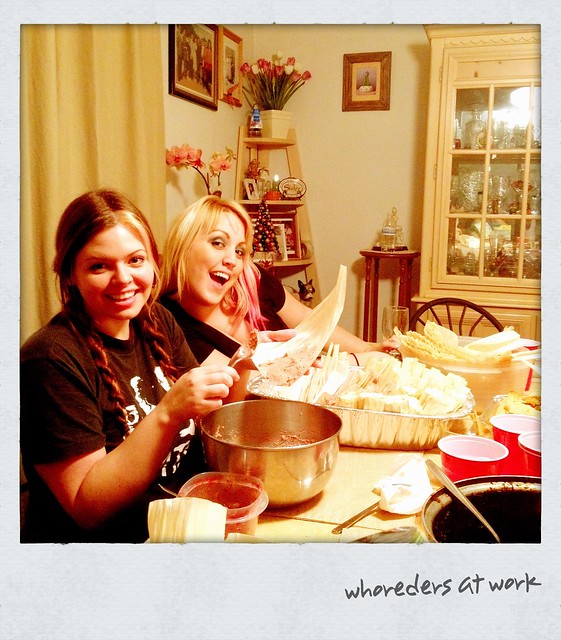
Whore(der)s and friends gathered together this past weekend to make Tamales! Tamales, say it with me, Tuh-mall-eez (well, actually it's more like ta-mahl-ess -vanessa). To most people, tamales are these amazing masa-rittos filled with your choice of delicioso meat. To Heather and I (crazy Caucasians), they are a blank slate for our culinary craziness! While Vanessa's awesome mom Maria made Puerco y Chilé Tamales (please say that with the correct amount of Mexican), Vanessa made Bacon & Cheese and Limón Sweet Masa Tamales.

On the other side of the tamale spectrum, are Heather and I. While I made Berries & Cream Tamales (an idea I stole from Heather), Sugar & Brown Sugar Tamales, and Hash Brown-Cheese-Bacon-Casserole Tamales; Heather made Egg-Cheese-Green Peppers-Zucchini Tamales, and Peanut Butter-Jelly Tamales. Yes, Peanut Butter & Jelly.... To make things more fun, the sweet masa was a pink flamingo hot pink. So not only did we have deliciously disturbing fillings, the outside looked offensive as well. My Hispanic Grandmother would have slapped me with my own tamale if she knew what type of blasphemy was occurring over in the Tamale Town Kitchen. Who knew tamales could be so exciting?

Thursday, December 8, 2011

Get Nailed: Out Damn Spot!

So usually I write about how i did me some awesome nails, but this week, I'm writing how to undo these damn nails I did last week! Imagine my surprise went I went to remove my O.P.I. nail polish, and it didn't come off! What is this world coming to when you can't even count on O.P.I nail polish ?? ?Okay, maybe that was a bit dramatic, but I looked like I fingered the Hulk. Yeah, I said that, now deal with it.

I don't know if any of you have ever suffered the embarrassment of the dreaded "Nail Stain". It usually occurs when you don't use a base polish, use a really cheap polish, or a heavily pigmented polish. I never knew how to completely remove the polish stain, so I usually just painted over it, but this time I ventured  to my magic machine (the computer), and researched (aka Googled) the hell out of it.

I found the simplest way to remove the stain is this:

1) Remove as much as you possibly can with Nail Polish Remover.

2) Get  a cheap manicure kit, and go to town! No seriously, buff and smooth your nails with buffer stick (I may have made that name up) push back your cuticles and cut them with the cuticle pusher/cutter, which is super easy (even thought it looks scary). Next clip and/or file your nails as necessary. Lastly use the "Shine aka Side 2" of the "buffer stick" to polish your nails, and voila, the stains are gone! At most, this took me 10 minutes for both hands.
                                
    IT STARTED LIKE THIS
(DON'T JUDGE ME, I WASN'T DONE CLEANING THEM UP YET)

Friday, December 2, 2011

Get Nailed: That's a Wrap

Yay, December is finally here, and all I can think about is presents...err the presence of Christ. The Wisemen brought presents to Jesus (is it weird that I pronounce it Jesús in my head?) so maybe Christmas really is all about presents? Well whatever your take on presents and Christmas (or Hanukkah for that matter) is, I decided to paint my nails like a present in anticipation of the holidays.


What you will need:

Clear base coat
Solid Polish
Clear top coat
Nail Pen or Nail polish with an art brush
A gem or glitter polish


Wednesday, November 23, 2011

Crockpottery


So... a few posts ago I mentioned that I won a slow cooker, well, I got it. AND I LOVE IT. It doesn't make my life any easier... I'm not gonna lie. It takes about the same work as a normal meal, but slow cooking your food can bring out a whole different taste. It allows the flavors to mingle and the textures to crumble (in a crumbly moist way, not a crumbly no-no way).

I plan on making a bunch of recipes in this bad boy, but for starters I went with chili. And again, I challenged myself to only use what I had in the kitchen ready to go.

Friday, October 28, 2011

Get Nailed: By the Dead

Get nailed by the dead? Whoreders say what??? No I'm not talking about necrophilia you pervs, I'm talking about Obituary Newspaper nails, duh! So now you're probably even more confused which perhaps means that you are eagerly reading to find an answer to what all this cray cray-ness is about.
Well, I'll tell you, it's about this awesomeness!
                                             
                                                  BAM!!!!


Thursday, October 27, 2011

Matzo Ball Soup: How do I love thee?


It's the week before Halloween in New York City. In a perfect world, I'd be walking down Broadway after a long day at work, wearing a cute, fitted trench coat and sipping a pumpkin latte and maybe even kicking up some yellow and orange leaves under foot. The soundtrack on my iPod would be something dreamy like Fleet Foxes, Cocteau Twins, or classic Feist. Tonight was not that kind of autumnal evening. It was bone chilling, ice cold rain and wind. I could get some specifics from weather.com but let's just say it was a watery hell. Anyone remember "frog in a blender" from the early days of the internet? It's better if you don't but if by chance you do, you'll know how pretty much all of commuting Manhattan felt during rush hour tonight. During my short walk to the subway, my favorite leopard print umbrella spastically inverted itself not once but twice before breaking and ending up in a pile of other defeated, dead umbrellas (RIP). My cold, clammy hands turned an unhealthy shade of pink and my iPhone was getting an unwanted shower even though it was deep in my coat pocket. I'm pretty sure I even saw a little girl in tiny rain boots almost blow away before her father could save her. I couldn't get home and get dry fast enough. Once at my apartment and after peeling off my wet, chaffing jeans (the worst!) there was only one thing I could imagine warming my rain soaked, weathered, and slightly bittered soul: a  bowl of matzo ball soup. 

Thursday, October 13, 2011

Get Nailed: Once You Go Black...

Once you go black you never go back! I'm talking about nail polish of course you pervs!


What you will need:
Clear base coat
Base polish(es)
White Nail Pen
Clear top coat


How to do it:

1. As always, start with clean nails and apply a clear base coat.

Saturday, October 8, 2011

Get Nailed : A Stitch in Time


What you will need:
Clear base coat
Base polish(es)
Black Nail Pen
Clear top coat


How to do it:

1. Start with clean nails and apply a clear base coat.


2. Next, I applied 2 coats of  Essie polish in Lilacism to my left hand, and 2 coats of Sally Hansen Mint Sorbet to my right hand. You can use any color you like, but try to stick with lighter colors, or the stitches won't really be visible (as shown below). Make sure to let the polish completely dry before going on to the next step.


3. Once nails are completely dry, take your Sally Hansen (or any brand really) black nail pen and randomly draw stitches. You can draw anywhere from 1 -  3 "sutures" on each nail, any more than three and it looks too busy.


4. Let the stitches dry, and follow with a clear top coat.


Your finished product should look something like this!


Friday, October 7, 2011

Welcome to the Ebates Hotel


FREE MONEY.

It does exist. Kind of.

So, a few months back I stumbled across a website (Ebates) that claimed to give you money for shopping online. I was sceptical, but I liked the idea of getting a percentage back on my purchases, so I signed up. I didn't tell any friends about it until I actually received a check so that I knew it was legit.

Once I got the money... oh lordy, I was excited. I told all my friends and got a few of them to sign up too. Not only will they get paid to shop, but I get referral money added to my account and can even got bonuses if I sign up enough people.

Exciting, no?

So here's how it works:

Thursday, October 6, 2011

How to: Make Your Own Magnetic Make-up Board

Things you will need:
Magnets
Hot glue
Hot glue gun
Sheet metal (thinnest gauge available)
Frame (size of your choice)
Picture Hooks
Hammer
* Sheet metal scissors aka Tin snips
* Ruler & Pencil
* Metal file


*Optional


Wednesday, September 28, 2011

Get Nailed: The Half Moon Mani


What you will need:Clear base coat
Light colored polish
Dark polish polish
5-10 reinforcement stickers
Clear top coat


How to do it:
1. Start with clean nails and apply a bas coat.

2. Apply 1-2 coats of the light base polish (depending on the coverage of the polish). Let the polish dry for 20-30 minutes.If you do not let your nails dry, you may peel off the nail polish when removing the reinforcement stickers.

3. Once nails are completely dry, place a reinforcement sticker on each nail with the outer edge of the sticker mimicking the shape of the moon of your nail.