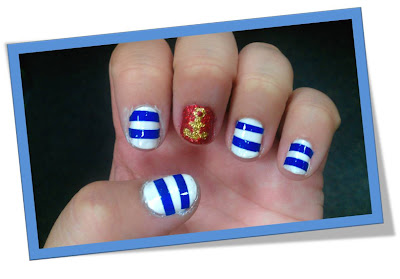
I don't know why I kept running into so many problems with this manicure. I initially couldn't decide which colors I wanted to use or what type of design I wanted to draw. Once I decided what to do, I kept smudging my design and having to start all over. I tried to freehand stripes but I don't have a blue nail art pen or nail brush so those came out horrible, then I tried to paint my nails white, place scotch tape where I wanted the white stripes to go then paint over that with navy blue but it kept ripping off my white polish. In short, I felt like an idiot. I finally decided to paint scotch tape blue, yes I said paint the tape, and cut it into strips.
1) Take a strip of scotch tape and paint it whatever color you would like your stripes to be, let dry.
2) Cut colored tape into straight strips, trim to fit nail and cut them to your preferred thickness (that's what she said).
3) Apply the base coat, then pick a base color. I used white for all fingers except my middle I used a glitter red.
4) Next, after white polish is dry, apply your stripes and cover nails with clear top coat.
5) On my middle nail I chose to draw an anchor which is much easier than you would think. Check out this really simple tutorial here. and BAM!, we're done!


those are cute!
ReplyDelete