

Whore(der)s and friends gathered together this past weekend to make Tamales! Tamales, say it with me, Tuh-mall-eez (well, actually it's more like ta-mahl-ess -vanessa). To most people, tamales are these amazing masa-rittos filled with your choice of delicioso meat. To Heather and I (crazy Caucasians), they are a blank slate for our culinary craziness! While Vanessa's awesome mom Maria made Puerco y Chilé Tamales (please say that with the correct amount of Mexican), Vanessa made Bacon & Cheese and Limón Sweet Masa Tamales.
On the other side of the tamale spectrum, are Heather and I. While I made Berries & Cream Tamales (an idea I stole from Heather), Sugar & Brown Sugar Tamales, and Hash Brown-Cheese-Bacon-Casserole Tamales; Heather made Egg-Cheese-Green Peppers-Zucchini Tamales, and Peanut Butter-Jelly Tamales. Yes, Peanut Butter & Jelly.... To make things more fun, the sweet masa was a pink flamingo hot pink. So not only did we have deliciously disturbing fillings, the outside looked offensive as well. My Hispanic Grandmother would have slapped me with my own tamale if she knew what type of blasphemy was occurring over in the Tamale Town Kitchen. Who knew tamales could be so exciting?

The lesson everyone learns during their first tamale-fest is: making tamales is no joke, it's hard work. You might think dreaming up flavors to make is the difficult part, then you show up and see pounds and pounds of masa (corn dough, made from ground hominy), piles of corn husks and giant cauldrons on the stove. The first step at our Tamale Town is done a few days before, you go to a trusted panaderia (Mexican bakery) to order your masa. There are two kinds, savory and sweet - and you need to specify which one you want (it's important). You'll save yourself hours of prep time by ordering it rather than making your own. It not only needs to be seasoned correctly, but it needs to be kneaded until it's fluffy perfection. Our first year we made the mistake of ordering it unprepared and ended up spending half the day trying to work the dough into a lighter texture AND we didn't realize it needed to be seasoned until after they were cooked. Ay-yai-yai!
Aside from the masa, you'll need:
- Corn Husks for wrapping the tamales. Other options are foil paper or banana leaves (it kind of depends on your own family traditions and preferences). Soak the corn husks in water to soften them up right before you start assembling.
- Steamers - do not let tamales touch the water, ever! Tamales should be steamed, not boiled!
- Bowls, trays, bags, foil paper - for storing tamales before and after cooking.
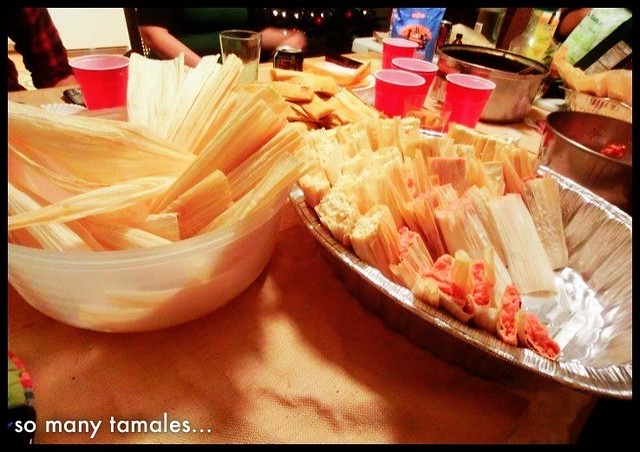
- Fillings - the options are unlimited, but traditionally you use some sort of meat & sauce combo for the savory tamales, and the sweet masa is flavored with fruit or brown sugar and doesn't have any filling.
- Lots of help. The more the merrier!

Okay, you've got your crew together and everyone has their gear... roll up your sleeves and get ready to roll wrap some tamales. Grab a husk and place it in your hand, widest side up and narrow side down, with a spoon/spatula place a large dollop of masa in the center and spread it out roughly into the shape of a rectangle. Keep the thickness even, about 1/4 of an inch - this will help the tamales cook evenly and keep them neat. Place your filling in the center of the masa, not too close to either the top or bottom edge. Wrap it up: left side, right side then fold the bottom up. The left/right order doesn't matter, but the bottom should be folded up last to keep your tamal closed. The masa will overlap, but that's okay, it's what will help keep it held together.


It might be a little overwhelming when you see the volume of food in front of you, but be strong! Continue drinking your holiday cocktails and telling embarrassing stories with your loved ones. At some point, everyone at the table will have that "Oh, my God, what are we doing?!" moment. Keep them calm, and remind them that once they're done, they'll never have to think about tamales again for another 364 days.
We were told that about 3 pounds of masa would equal roughly 12-15 tamales... we were lied to. It's actually a lot more than that. I'd say 2 pounds of masa can easily make a dozen of regular size tamales, and that's still a slight over-estimation.
The good news is that most people love getting tamales as gifts, so you'll be able to unload lots of your overage! Tamales also freeze really well, just make sure to store them in container that can hold up to the freezer. Thaw them out and enjoy them all year! To reheat them in the microwave, simply remove the husk and place a damp paper towel over it to keep from drying out. You can also re-steam them or use my favorite technique - put them (still wrapped in the husk) on a skillet. Mmmm... that adds some crunch to the outer masa that sends me into tamale heaven.
Aside from the tasty food, my favorite part of tamale making is the time you get to spend with your friends and family. After all the work is done and the pots have been scrubbed and put away, we all have full bellies and our hearts full of holiday love, just like the Grinch.
~Vanessa, Charlotte & Heather
 |
| Oliver can't resist the lure of our tamales. |
 |
| Our pal Paul Starling documents the magic. |
 |
| Curtis mostly just sat around judging us. |
I AM STILL WAITING FOR MY PLATE....
ReplyDeleteI will bring them, along with my mini poTATEo tacos to the finale party!
ReplyDeleteway to go girls! they look delicious!
ReplyDeletemy family is from el salvador so our process differs and i've always been curious how (step-by-step) mexican tamales were made.
I've never had tamales El Salvador style, how are they made?
ReplyDeletep.s. I made it about a week before I reached my tamale limit for the year!